
Saturday 27 November 2010
Facial Rigging Practice
My aim for this term is to learn facial rigging so that I can create the blend shapes that will make the expressions for the characters. I have not done this before and made this very basic Marmot head in order to practice on. His texture is just a basic file with a little bit of Planar Mapping.
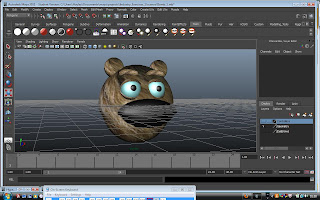
I made locators for the eye blinks as I feel the eyes will be important and tell alot about the Marmot character
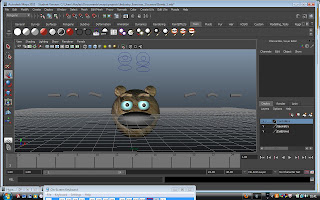 And used Blend Shapes to make the eyebrows move. I do not know why however when I tried to move his right brow it moved down here... it may be due to not freeze transforming the eyebrows properly when I copied it across.
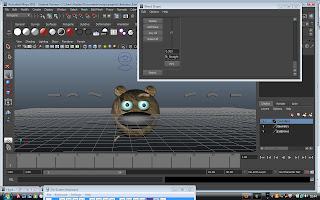
Here is my first rigging test of the year to show the blink working and at least the left eyebrow:
This is my first initial rigging test and I realise that it is only a refresher for using blend shapes, but I am glad I have done this before attempting more complex facial shapes and my aim now is to take it further where the eyebrows are part of the geometry of the face and also the eyelids may be aswell. It has also shown how there are different methods of using the rigs and how people may prefer to animate.

I made locators for the eye blinks as I feel the eyes will be important and tell alot about the Marmot character
 And used Blend Shapes to make the eyebrows move. I do not know why however when I tried to move his right brow it moved down here... it may be due to not freeze transforming the eyebrows properly when I copied it across.
Here is my first rigging test of the year to show the blink working and at least the left eyebrow:
This is my first initial rigging test and I realise that it is only a refresher for using blend shapes, but I am glad I have done this before attempting more complex facial shapes and my aim now is to take it further where the eyebrows are part of the geometry of the face and also the eyelids may be aswell. It has also shown how there are different methods of using the rigs and how people may prefer to animate.

Facial Expression Research
I have been using this book mainly as background reading as it gives a very indepth opening section about the different mouth positions and landmarking the eyes and eyebrows. Here are a few example pages from the book as there was too much to scan. I think by reading this, I have a knowledge of what the face can do and what is expected from the characters that I rig.


Example mouth shapes I can try and incorporate into my characters:


I started looking into my art books for inspiration with the facial expressions, as I feel I need to do some more drawing of them to help me push the blendshapes and bring the characters to life.
I liked the first image from The Animator's Survival Guide as it shows the squash and stretch of the face and how dynamic the shape of the face will need to be.

This image, from the Art of Wall-E, shows the facial expression with regards to the movement of the character. I will need to think about what my character will be doing and their whole body demenour when creating the blendshapes.
 Also, it may not be a completely human character that I am going to rig. I really like these images from the Art of Robots, showing how much personality and expression will be coming from robotic creatures.


Similarly, the Art of Cars shows their expressions. It is interesting looking at these books, as even though these are from CG films, they still plan all of the expressions out by drawing them. I think I need to do more planning.
The cars do have the really big eyes which is the focus of their expressions. It is really interesting to see how they tilt the front of the bonnet to create expressions too.
I found these videos on youtube, it has been really interesting to look at research into facial expressions, not just from an animation point of view but scientifically aswell.


Example mouth shapes I can try and incorporate into my characters:


I started looking into my art books for inspiration with the facial expressions, as I feel I need to do some more drawing of them to help me push the blendshapes and bring the characters to life.
I liked the first image from The Animator's Survival Guide as it shows the squash and stretch of the face and how dynamic the shape of the face will need to be.

This image, from the Art of Wall-E, shows the facial expression with regards to the movement of the character. I will need to think about what my character will be doing and their whole body demenour when creating the blendshapes.
 Also, it may not be a completely human character that I am going to rig. I really like these images from the Art of Robots, showing how much personality and expression will be coming from robotic creatures.

Similarly, the Art of Cars shows their expressions. It is interesting looking at these books, as even though these are from CG films, they still plan all of the expressions out by drawing them. I think I need to do more planning.
The cars do have the really big eyes which is the focus of their expressions. It is really interesting to see how they tilt the front of the bonnet to create expressions too.
Going back to traditional, this photograph from Timing for Animation shows possible expressions. The main emotions that seem to appear in my research are sadness, extreme sadness, smile/happiness, anger and shock. Obviously not pushing these to the extremes can make all kinds of emotions inbetween.

Finally, I just liked the expressions used here for Pluto from The Illusion of Life.
I found these videos on youtube, it has been really interesting to look at research into facial expressions, not just from an animation point of view but scientifically aswell.
Photography Reference
The aim of today was to take photographs of poses for the animation and to help draw the animatic better. We spent a while on this field in Greenwich near Ravensbourne taking video of Dean and Sam running around, Dean as the Marmot and Sam as the Mongolian.


These are some of the expression shots taken to help me with my facial rigging, although I am unsure what happened to the video footage :/


These are some of the expression shots taken to help me with my facial rigging, although I am unsure what happened to the video footage :/


Mood Boards
I initially started looking at colours on the Internet using this website. I searched for browns and thought these would be suitable for our film palette:


Using images taken either by myself or from the Internet, one for the environment, one for the Mongolian and one for the Marmot:


 This final one is one I made by hand using different images or materials I have found. As I am partly colour blind I find it easier to create things this way rather than using the colour palettes on the computer and enjoy being more creative.


Using images taken either by myself or from the Internet, one for the environment, one for the Mongolian and one for the Marmot:


 This final one is one I made by hand using different images or materials I have found. As I am partly colour blind I find it easier to create things this way rather than using the colour palettes on the computer and enjoy being more creative.
Rigging
THE WORK IN THIS POST IS PART OF MY ADVANCED SKILLS UNIT, BUT IS HERE TO SHOW THE PROCESS OF RIGGING I HAVE LEARNED THIS TERM
The model of 'Melvin' came with the rigging book, so I will be rigging him from scratch. My aim is to have a fully functioning rig that I can animate with and create to begin with a run cycle as this will work towards my final film.
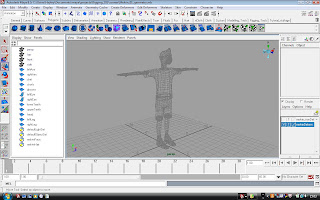
I started by creating joints in Melvin's legs and then for this body and head.
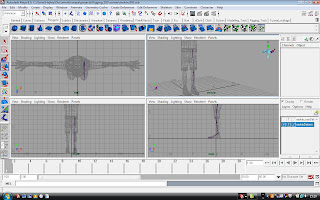
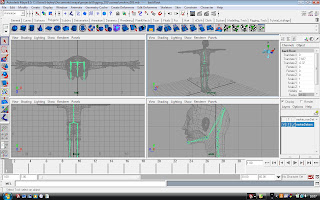 It then came to testing the angles of how the skeleton works, and adding IK handles to the feet in order to make them plant properly and have more control on the feet.
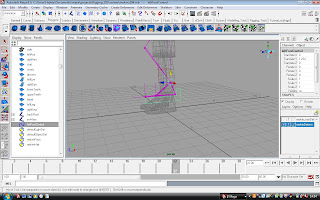
Having added the IK handles for both feet and coloured them accordingly:
The model of 'Melvin' came with the rigging book, so I will be rigging him from scratch. My aim is to have a fully functioning rig that I can animate with and create to begin with a run cycle as this will work towards my final film.

I started by creating joints in Melvin's legs and then for this body and head.

 It then came to testing the angles of how the skeleton works, and adding IK handles to the feet in order to make them plant properly and have more control on the feet.

Having added the IK handles for both feet and coloured them accordingly:
- The difference between IK and FK (it always confused me).
- How to rig the legs
- Adding attributes to the legs in order to rotate the bones from the controller
- How to add prefixes to names easily!
Carrying on with Melvin's rigging, this time with the arm set up. I do think it is a little wierd that the book does not move onto the hand setup after this, as it moves to the back and animating straight after this, but I will follow it through.


This time locators were used to influence where the arm bends so that the IK handle does not bend incorrectly in the middle of the forearm.
My focus for this term is to learn facial rigging so that I can create the blendshapes necessary for our characters over the winter period. I have therefore started a tutorial on it.
The first stage was to set up the character for the blend shapes by painting the weights into the face using the Edit Membership tool and the Paint Cluster Weights tool. I have never done this before and had to find video reference of how to use the Paint Cluster Weights tool but once I got the hang of it I was quite pleased with the results.
 I used the Reduce and Smooth tools mostly to widen Melvin's mouth and make the skin smooth around it.
 The next stage was to create a cluster for the mouth so that when it opens the cheeks also go inwards. This was done again using painting weights and then setting the cluster to be driven and the cheeks change shape as the jaw open joint is rotated on the axis.The next stage and aim for the weekend is to create the blend shapes so that I can animate and test Melvin :)
I have been carrying on with the facial rigging, this time creating the different expressions for the blendshapes.

I used a Nurbs curve and the Wire Tool to influence the shape of Melvin's face as you can see below:


I realised after doing the mouth shapes that Melvin's texture on that file did not include eyebrows, so I had to open the next file on the disc which did have in order to create the rest of the blendshapes as you can see below:
Subscribe to:
Posts (Atom)


